Three months of new features
It's been three months since toy has been first released to the public. A massive amount of work has been completed over the course of those three months, but as often happens with the development of such a vast project, not in the areas initially planned. As there hasn't been much communication about the progress, now is the time to make up for that.
The following long-awaited items have finally been implemented and crossed off the list of major to-be-implemented features:
- data-oriented ECS
- multi-threaded job system
- deferred rendering path
- clustered lights
- occlusion culling
- GI voxel cone tracing
- lightmap baking
- Wren scripting support
With these improvements, the engine stack is nearing technical maturity, and we can now move on to the remaining challenges: stabilize and document the engine, polish up the tooling, and work on the last unsupported platforms: mobiles and VR.
While we were working on these, Godot released a gorgeous demo a couple of weeks ago: it was an invitation to prepare our own variation of it, and leverage the open-source assets to demonstrate what toy can do. The web demo is right there at the end.
This article is gonna go over the batch of freshly implemented features one by one, to give a bit more details on the work accomplished. If you are just interested in trying the demo, you can jump right at the end of this page, but be wary that it might take a while to load, since it comes with about 50MB of data to load.
ECS
Ever since first watching the Unity ECS talk, an idea would periodically nag me: I had to ensure that the engine's design allowed implementing these techniques easily. Another related and long-delayed item was the need to multi-thread the engine: it would be much more straighforward to do so on a largely data-oriented engine. As those two imperatives joined, a few weeks ago, I set to finally design an ECS and migrate all game objects to it.
After a bit of reading and a quick study of the libraries out there, the following simple design emerged. An ECS is a set of entity streams, each stream associated to one prototype (which is the set of components that make up that entity). Each entity stream is itself a set of N arrays per each component type, or SoA. An entity is a sparse handle, whose associated index points to the same offset into each array of that stream.
What is enabled by this design ? The systems iterate any subset of components (A, B, C) they are interested in, by fetching all entity streams that match. Iterating the entities in those streams is ensured to be the fastest possible: we progress linearly along N contiguous arrays in memory, without any branches or cache misses. Some further optimizations could be added later by dividing the streams into chunks, allowing for quick creation and destruction of large groups of objects.
How would this change the usage of the engine ? We already had entity and components: they just weren't laid out in these tightly packed buffers, optimized for the fastest possible processing. They could, instead, be stored anywhere. The most constraining aspect of the new ECS system, from the user perspective, is that it is not allowed anymore to hold to a pointer to any entity or component managed by the ECS. But some would argue that handles are the better pointers anyway.
To demonstrate that the ECS worked, and verify its performance, it was only natural to implement the exact same boid example described by Mike Acton in his talk.
Thanks to that brand new ECS, we can now say it, toy offers performance by default.
job system
The ECS itself is an enabler for parallelizing the work: it ensures each component is laid out in nicely packed contiguous arrays. This is the perfect setup to divide up the update of components in smaller batches that we can delegate for processing by a job system. Only, for that, we need a job system. toy, until then, didn't have one.
In general, I try to find and use existing small self-contained solutions to technical problems, as long as they exist in a form we can easily depend on. There wasn't an obvious choice on the matter of the job system. There are however, many great resources and in-depth articles describing the technical solutions. One such great article is Lock-Free Work Stealing.
After trying a couple of C++ libraries, and encountering different issues with each, we ended up with an implementation based on the job system from Filament, and described in the articles above, only with modern C++ atomics. It is centered on a lock-free work stealing queue, of which there is one per worker thread, and a shared pool of jobs. Nothing fancy, it all fits in a few hundreds lines of code.
The test of fire for that system, was running the previous boids (try them live here), on multiple threads, simulating about 250K boids at decent framerates. The job system not only enabled us to parallelize the components that live in the ECS, but also the renderer loop. Parallelism in toy is still overall a work in progress, but it definitely got a huge headstart with these improvements, and the user code can now schedule jobs, too.
deferred rendering
Although the rendering library that powers toy had been thought out to be a flexible middle level renderer, with a higher level PBR rendering pipeline on top, it so far only featured one main render path: a good old forward renderer.
Forward rendering is the simpler alternative, and as such, it's the one that got implemented first. Modern AAA games demonstrate daily that it's all but incompatible with high performance. However, in the prospect of improving the overall rendering performance, one obvious item was to limit shading pixels multiple times, and especially the lighting computations. One way to achieve that is deferred rendering, so I started laying the groundwork so that deferred rendering would be one option in the set of tools provided by the rendering library.
The result is a minimal deferred rendering path that handles rendering of opaque PBR materials correctly. It starts with a geometry pass, which sample and outputs the surface/material properties to a handful of GBuffers: normal, albedo, roughness... The subsequent lightning pass just draws a single rectangle spanning the viewport, and the shader applies the same logic and calls the same functions as in the forward rendering shader, except its inputs are reconstructed from sampling the GBuffers.
Aside from the usefulness of a deferred pipeline, this demonstrated how straightforward the renderer makes implementing a completely different rendering path. As a user of the engine, you have the power of defining your own custom renderer from A to Z, shaders included.

clustered lights
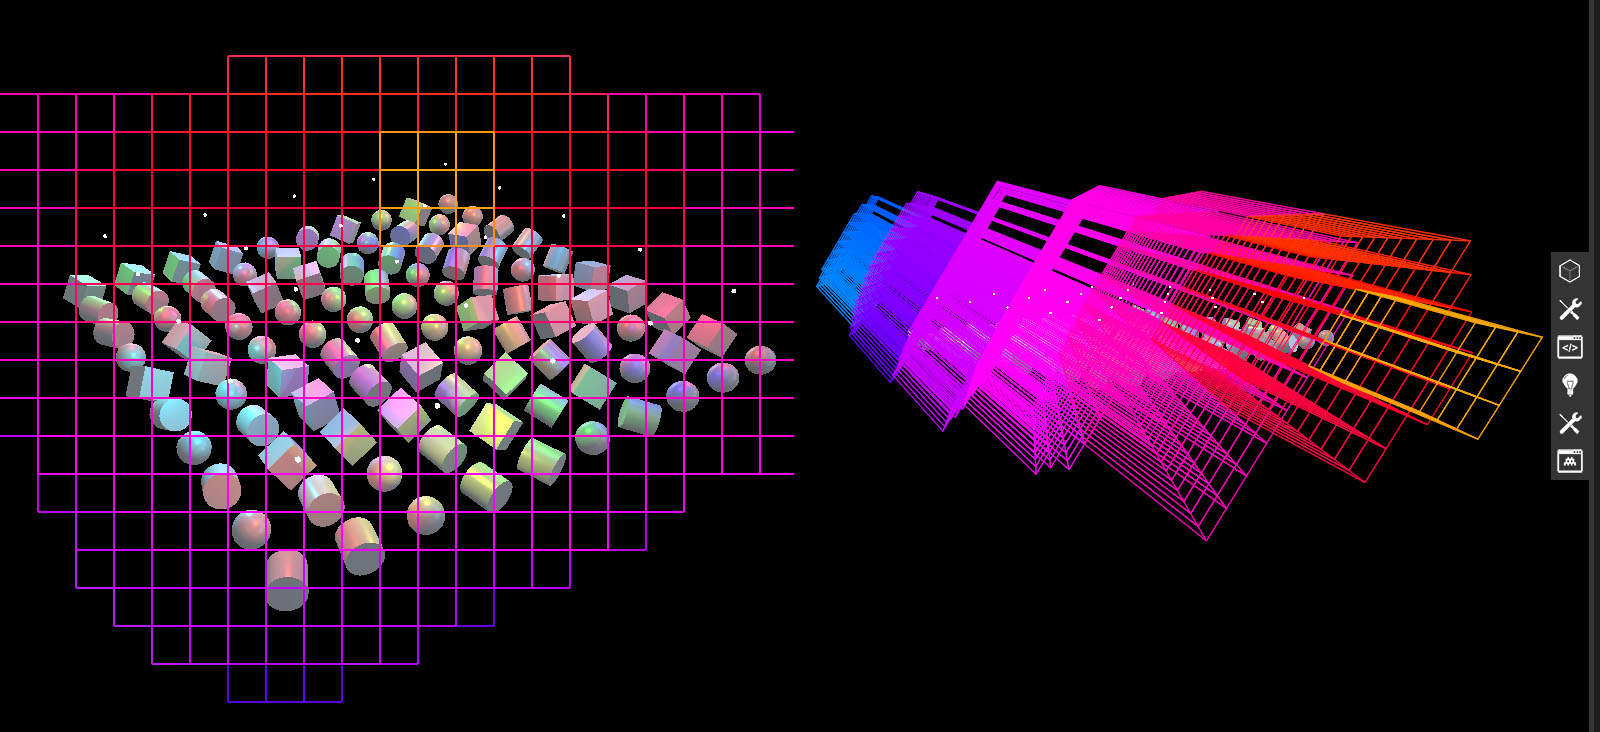
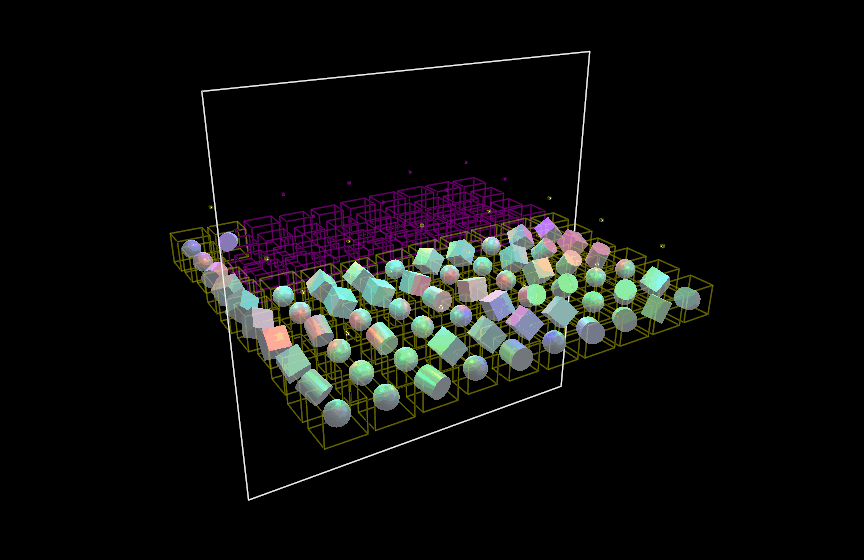
In order to further enhance the rendering performance under complex lighting, the next logical step was clustered rendering. The aim of this technique is to limit the amount of lighting computations per pixel by distributing the visible lights in a set of clusters, which subdivide the view frustum along 3 axes (as opposed to tiled rendering which does so only in 2). Each fragment then only processes the lights referenced in the cluster it lies in, resulting in much fewer computations overall. The seminal paper that introduced this technique is here.
The simpler version of the clustered rendering algorithm we opted for, performs the following tasks on the CPU. First, we compute the planes that make up the frustum 3-dimensional grid each time the viewpoint changes. Second, an intersection is performed over the cluster grid to determine which clusters each light overlaps with. This is done by coarsly estimating the light's minimum and maximum cluster coordinates, and then refining the exact overlap by testing the light bounds against each of the planes, incrementally reducing the overlapping cluster volume. Lastly, we store each cluster's associated light indices in a set of per-cluster records that are then sent to the GPU.
The work of the shader itself, is only slightly different in clustered as opposed to non-clustered: instead of fetching a global list of light indices, each fragment invocation needs to reconstruct the index of the cluster it belongs to, using the view-space coordinates. Using this cluster index, a list of light indices is reconstructed, and the lights are processed exactly as in the non-clustered version.
With this addition, the engine now has the capacity to render scenes with thousands of lights at reasonable framerates.
occlusion culling
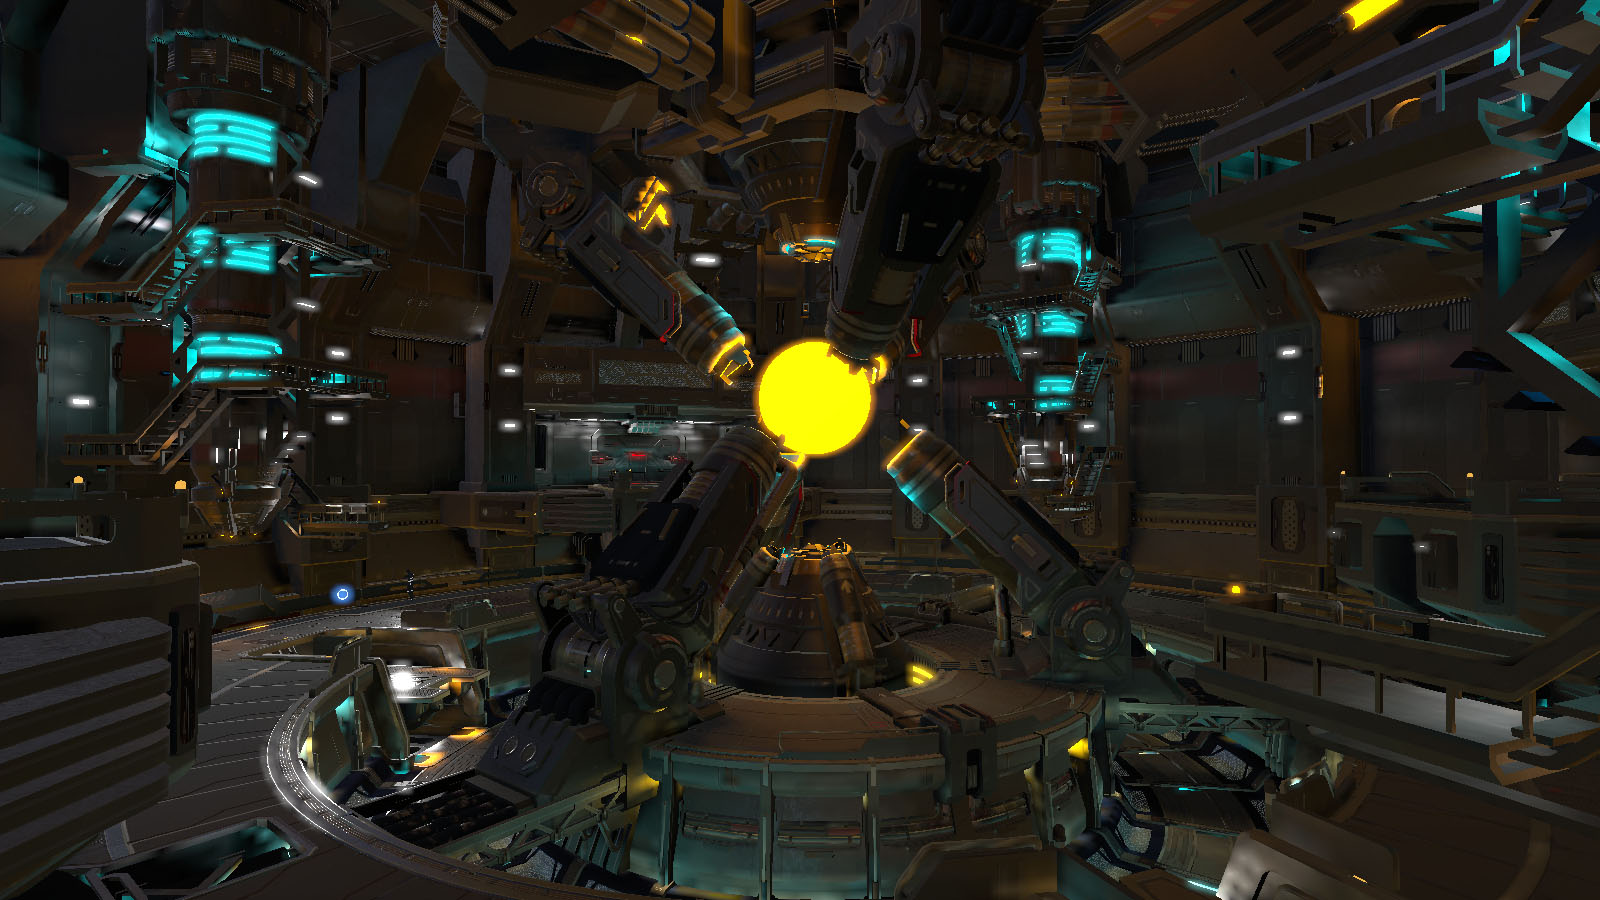
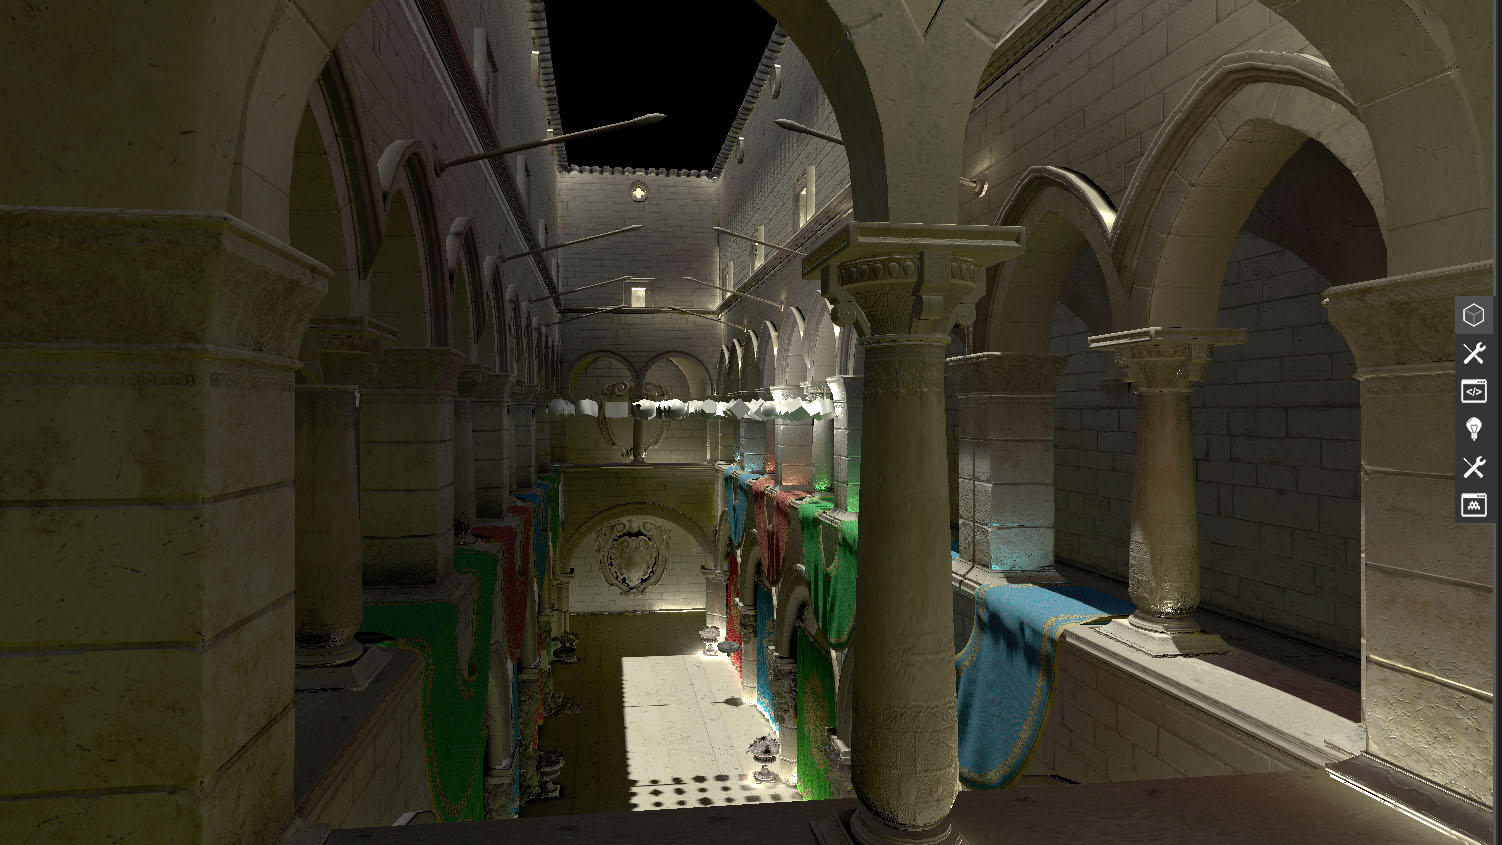
There wasn't any plan to add occlusion culling to toy, until work started on the demo of the Godot reactor scene. It became quickly obvious that the scene was putting the engine in a difficult position, particularly on the modest GPU of my development machine. It turned out that the triangle count was just too high to hope rendering all the geometry in the view frustum, each frame, at a playable framerate.
The scene is arranged in such a way that many objects in the frustum, and therefore sent to the renderer, are not actually visible at all. This is the perfect setup for occlusion culling: by testing whether objects are occluded by something, we can save ourselves the work of sending these invisible objects to the GPU in the first place.
To illustrate this, this image shows how much occluded geometry we can save the work of rendering, on this particular scene.
A survey of the available options convinced me that CPU occlusion culling is a very viable solution, thanks to the latest work brought forward with Masked Occlusion Culling, and leveraging the processing power of SIMD instructions. Granted, that the geometry of occluders is simplified for this use, it makes sense to rasterize those occluders at high speed and without latency on the CPU, with the added advantage of offloading work from the overloaded GPU to the under-utilized CPU.
Fortunately, the techniques described in that paper are fully implemented in this public open-source C++ library (with variants for most SIMD instruction sets), which made integrating it a matter of simply adding the dependency, and writing a couple hundreds of lines of code to hook it in the renderer. Unfortunately, the absence of SIMD support in WebAssembly, means the web demo doesn't benefit from this improvement.
With this last feature, users of the engine or the rendering library, can now benefit from sizable performance gains, provided that some simplified occluder geometry is included in the assets, or procedurally added to the scene.
global illumination
Global illumination has been for the longest time on the list of state-of-the art rendering techniques I wanted to document myself on, and implement in the engine. It's upon reading Voxel based Global Illumination (from the creator of the Wicked Engine), that I couldn't delay the thought further. The article explains the key principles in a very clear manner, giving me the confidence that it could be implemented in a reasonably short time frame.
The first axis of the technique is the voxelization of the scene, which produces a voxel 3D texture of the scene with each voxel's albedo, normal, and light. Some engines do this on the CPU, but this pass can be implemented as a regular GPU render pass, with a special geometry shader which projects each triangle on its dominant axis. The fragment shader then outputs the properties of the projected fragments to the 3D texture. The specifics of this method are further described in Basics of GPU Voxelization .
The challenge with implementing this part has been that two requirements were missing in bgfx (the low-level rendering library that toy is built on top of). First, geometry shaders are required (albeit a very simple one, that outputs one triangle per input triangle). Second, the fragment shader needs to random-access write to the output texture, which requires different setup on different platforms (e.g. UAVs on D3D). It took a bit of work to add support for those things, but the features are now in our bgfx branch and might be merged at some point.
The second axis is the voxel tracing, which acts as the transport for diffuse or specular light bounces. Each cone is traced by sampling the voxelized scene texture along a growing radius and at different mipmap levels, until fully obstructed. For a single bounce, the diffuse cones can be traced directly from the material fragment shader. For multiple bounce, they can be traced from a intermediate compute shader step, which will accumulate the light of the diffuse cones in the voxel texture itself.
As a result of a couple of weeks of hard work, toy now features a working global illumination. There are some issues to iron out, and the performance hasn't been verified to be anywhere near real-time usability yet, but this will come, in time. And until then, you can bake it.
lightmapping
With global illumination implemented, toy can finally render scenes such as the one in the Godot demo, in all its emissive greatness. However, with real-time voxel cone tracing, it comes at the cost of a very high framerate on anything but a high-end gaming rig, which makes it nowhere near usable on platforms such as the web. To bring these environments to life on these platforms, in their fully illuminated glory, we need to compromise for lighmapping, which bakes the result of the global illumination computations to a set of static textures called lightmaps.
The main piece of work — and requirement — in order to generate those lightmaps, is to get a flat and non-repeating unwrapping of all the lightmapped geometry, each triangle ending up with unique coordinates on that UV texture plane. Definitely not an easy task. But fortunately, a couple of libraries exist just for that purpose. thekla atlas is the unwrapper used for the lightmapping in The Witness, kindly released as an open source library a couple years ago. xatlas is a smaller, lighter version of the same code. Using it, we can unwrap our meshes to a set of beautiful future lightmaps.
Once all the to-be-lightmapped geometry lying in the target volume has been unwrapped on the corresponding lightmaps, we can render these. This step is surprisingly straightforward: it's a simple usual render, with the only difference that the coordinates output by the vertex shader are the values of the vertices second set of UVs (=their position on the lightmap texture plane). The fragment shader needs only compute the indirect lighting, and voila, our lightmaps are rendered.
This technique presents, aside from its static aspect, some notable drawbacks: the meshes need to be repacked with a second set of UVs, and the lightmaps, even if encoded to a compressed format, still take a sizable amount of storage, causing the whole scene to be significantly heavier.
It has also, however, some serious advantages, like the ability for you to play that scene in the browser, looking almost just like the real-time voxel cone traced counterpart:
the way forward
With these improvements, toy is getting closer and closer to a possible first stable alpha release. The plan for the following months is to flesh-out and stabilize the ecosystem around the code, in terms of tooling, documentation, and supported platforms. If you are interested in seeing the engine reach that milestone, please consider supporting us through our patreon page.
Once again, all these features have been implemented inside of the lower-level mud library that holds most of the power behind toy, so you can benefit from these without using toy as well, for the purpose of writing live graphical apps in general. Feel free to experiment with it, and don't hesitate to open issues and send us feedback when something is unclear or doesn't work as expected.